User Manual of BMS 12S-16S
![]() TOPBMS--Li-ion and LiFePo4 BMS 12S-16S Specification PDF.pdf
TOPBMS--Li-ion and LiFePo4 BMS 12S-16S Specification PDF.pdf
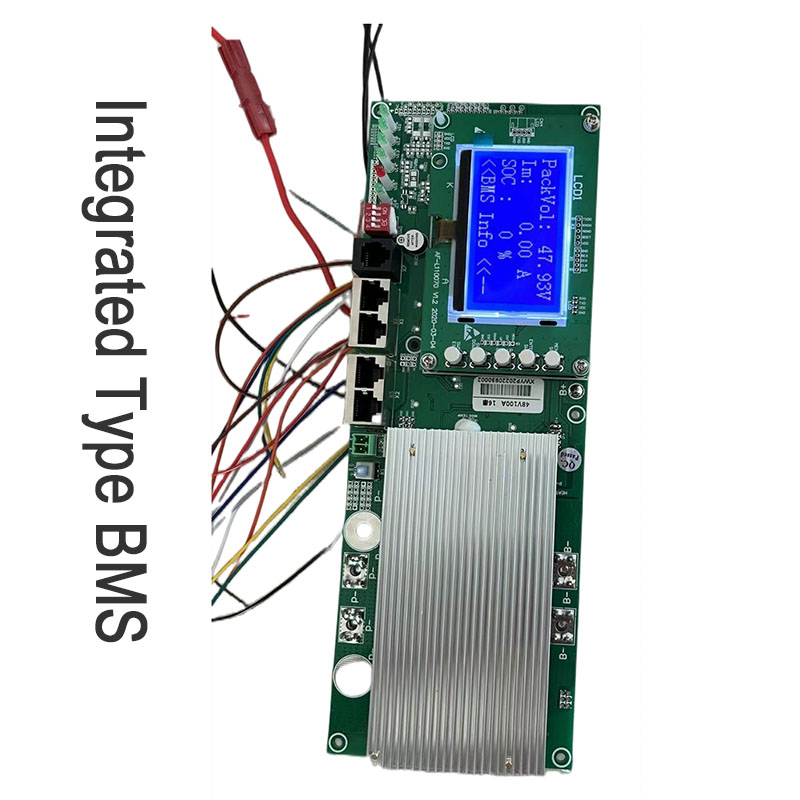
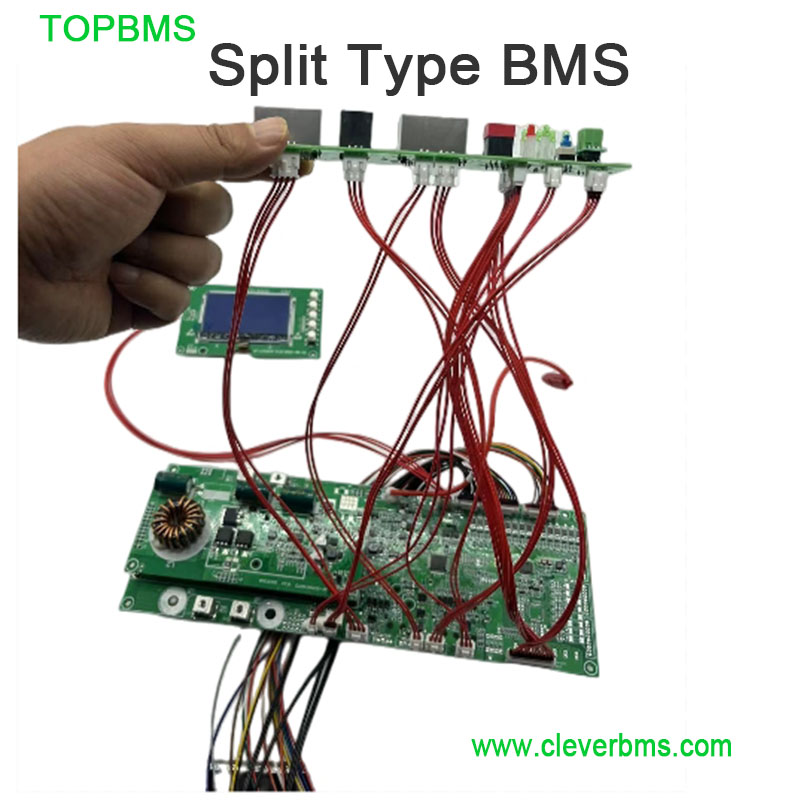

Step 1 : How to Configurate BMS
if one pack , please take all dip switches to go up
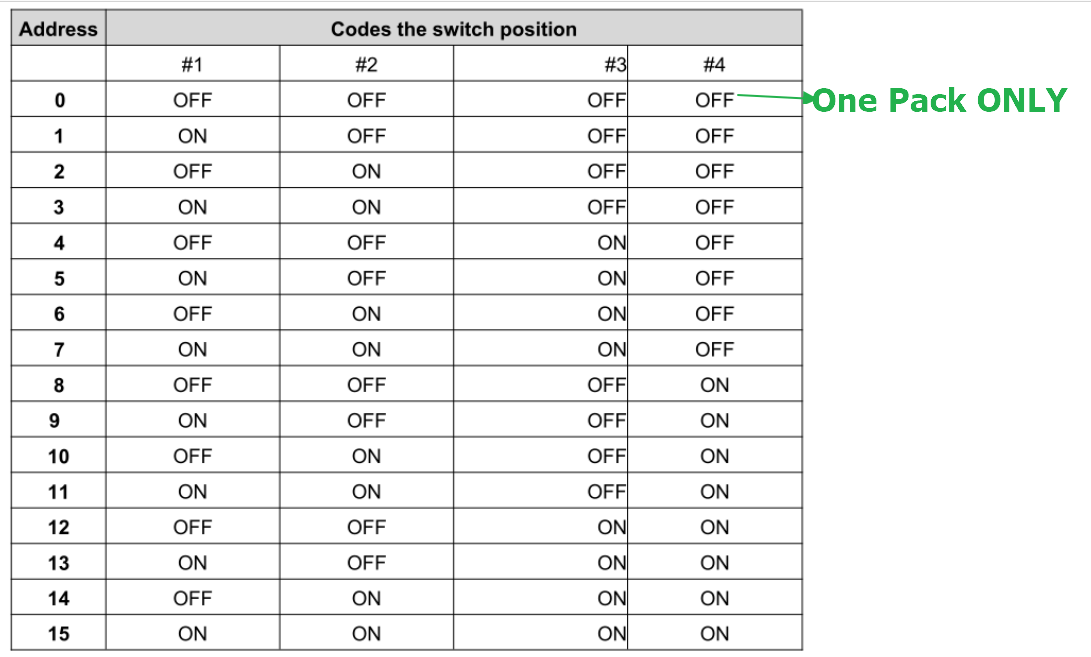
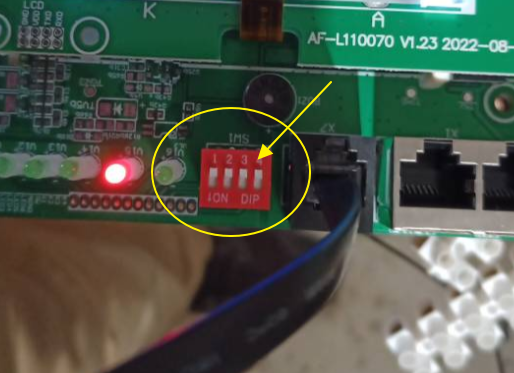
If >=2 packs in parrallel , Please take all switches to these posotions , please see below
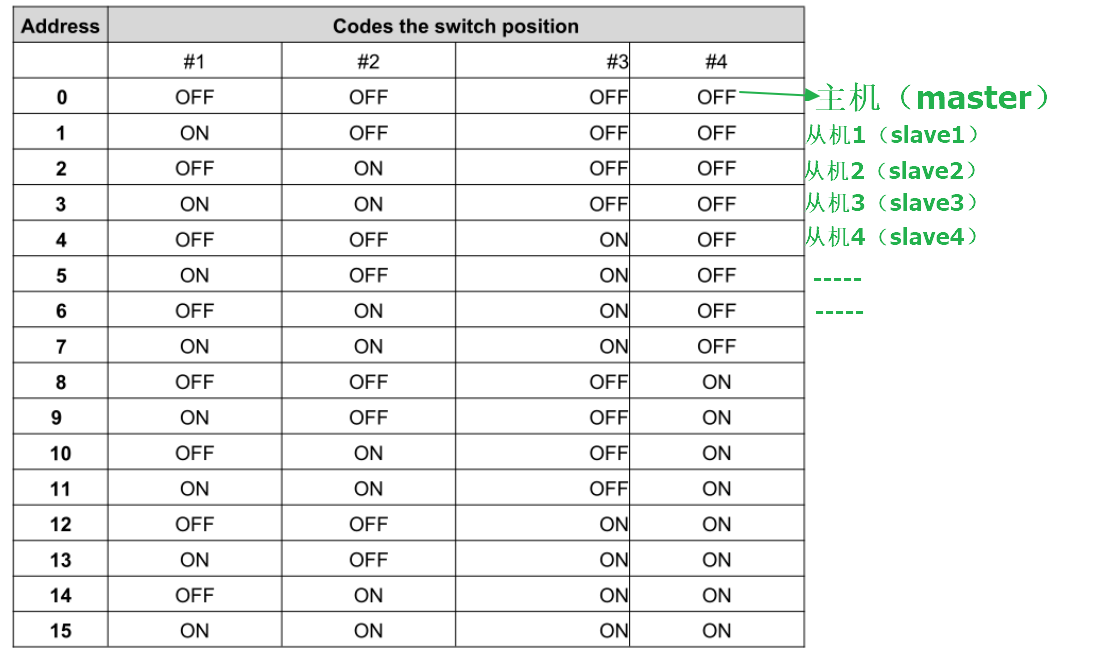
Please be aware that if you have wrong dip switch postion , the BMS can not work ;
Step 2: Open PC software and then switch to english version , please see following
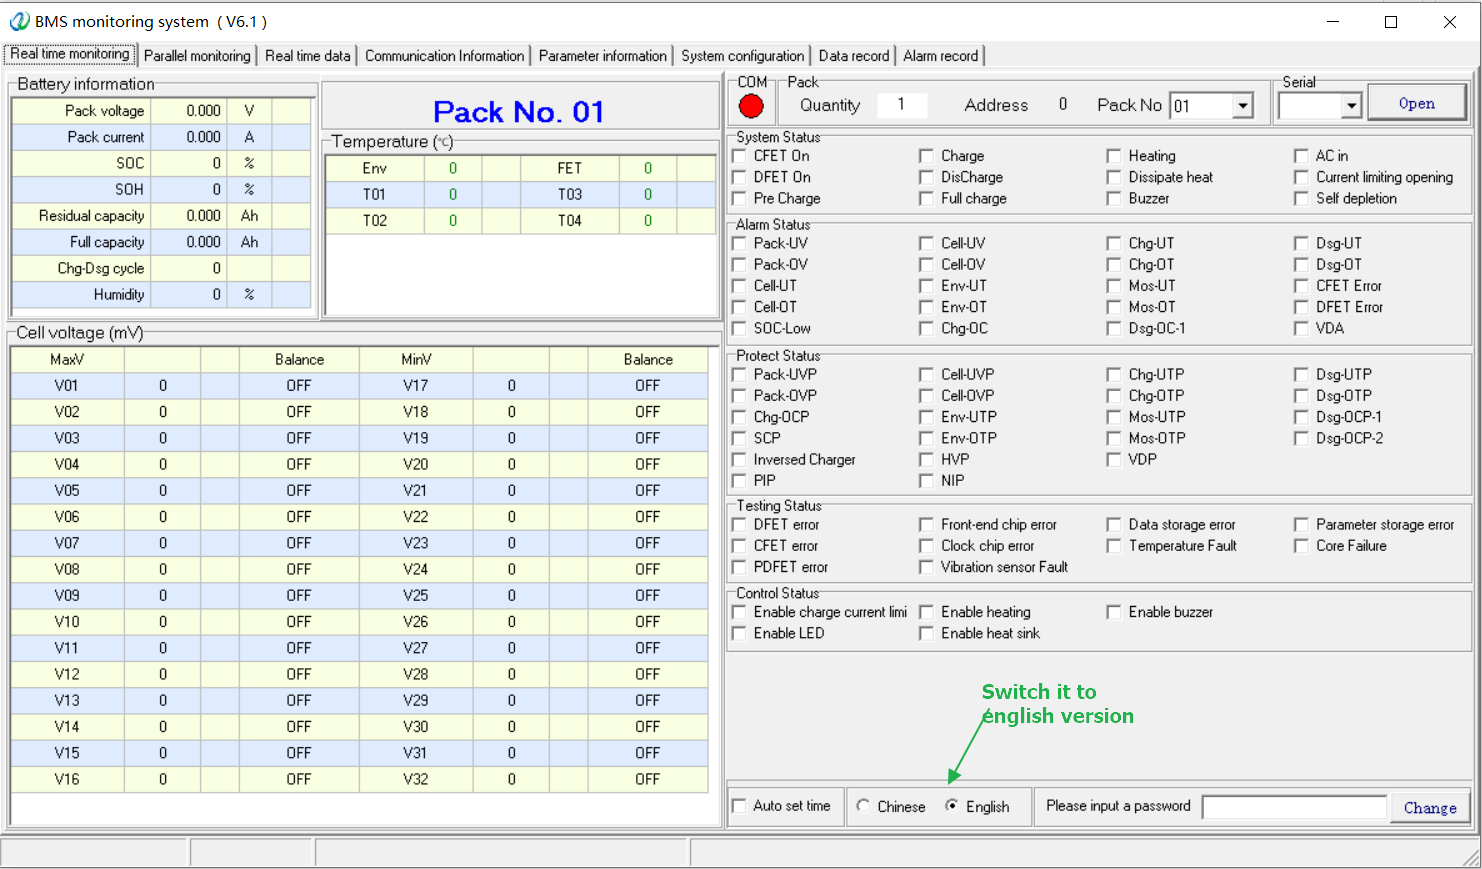
If one pack only , You can do setting as below in the software :
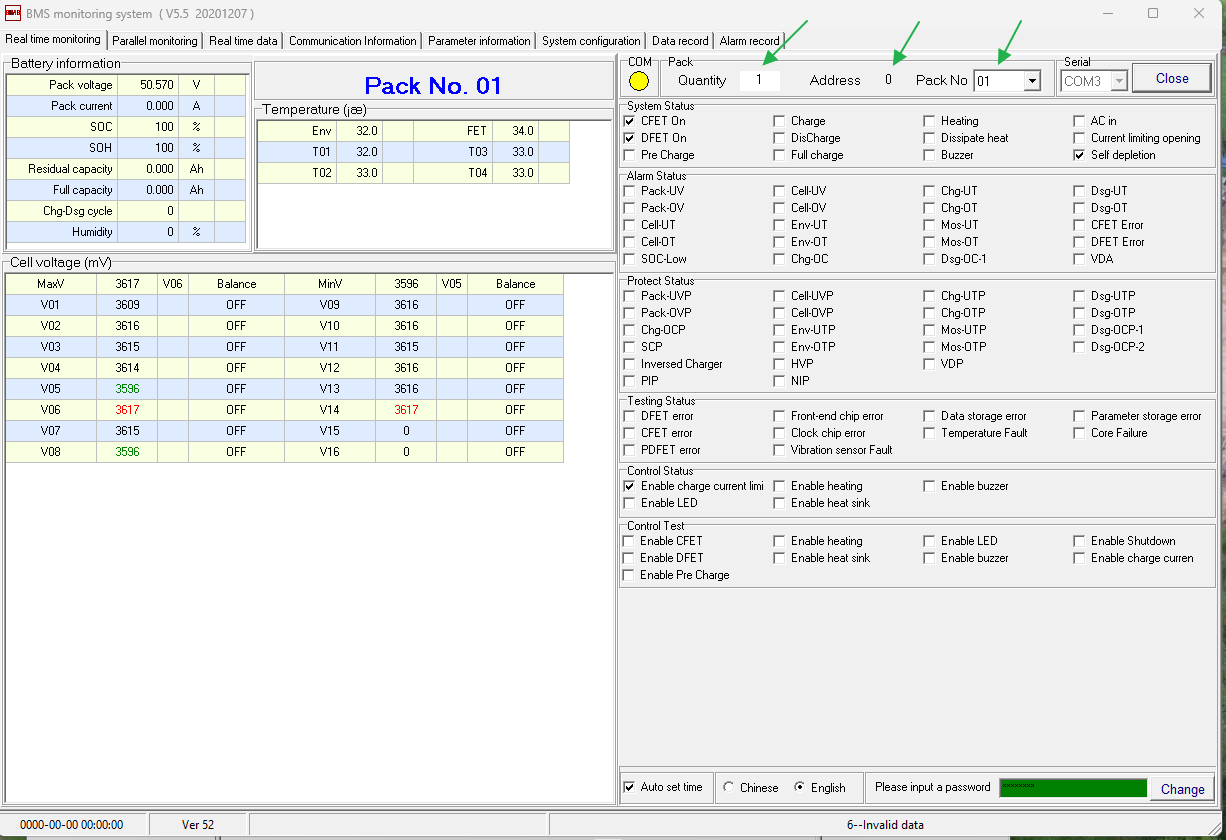
If >=2 pack only , You can do setting as below in the software :
first of all , you need to set the dip switch in the master bms and slave bms correctly ; and then setting will be created in the PC software

How to take BMS to commucate with the inverter you exepected ? Please see following

Change the parameters via PC computer , please see the following video

If the SOC is not showed correctly , please take a complete cycly of dischagring and charging ; and then the SOC will be calibracted automatcally
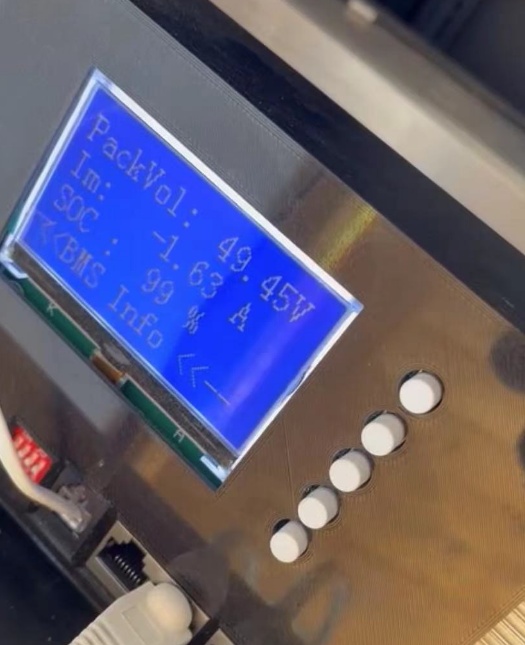
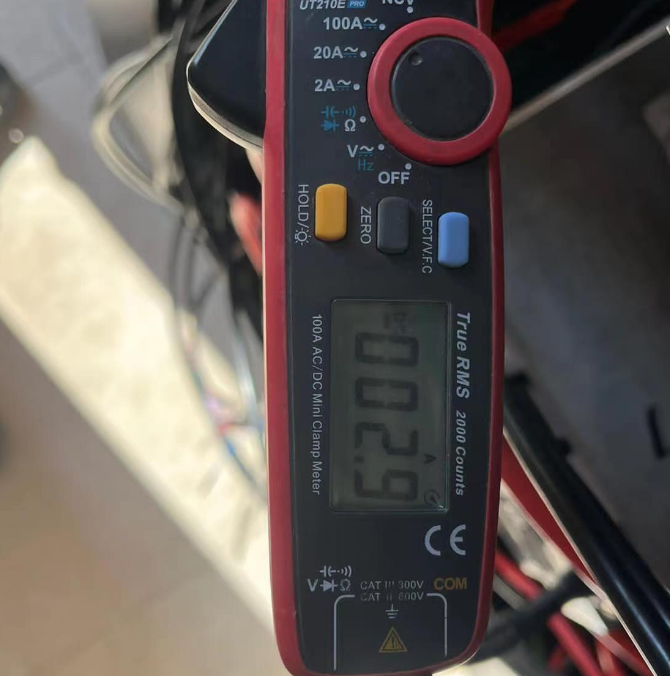
If the current is not showed correctly , please do current calibration like this :
Zero Current Calibration :
Step 1 : if BMS is disconnected to charger and load ,the current display show is not zero ; please do curren calibration in this way :
Please go to the page of "System Configuration" and then click "READ" and then click "RESET" ,finally click "CALIBRATION "

Current Calibration if the bms is connected to load and discharging current is not in line with actual discharge cuurent
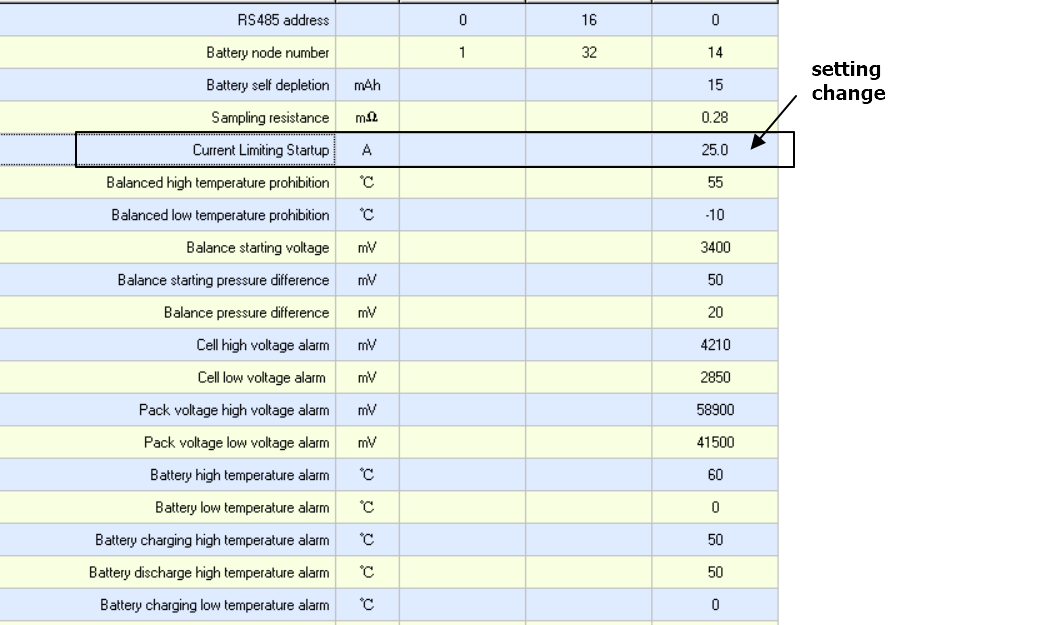
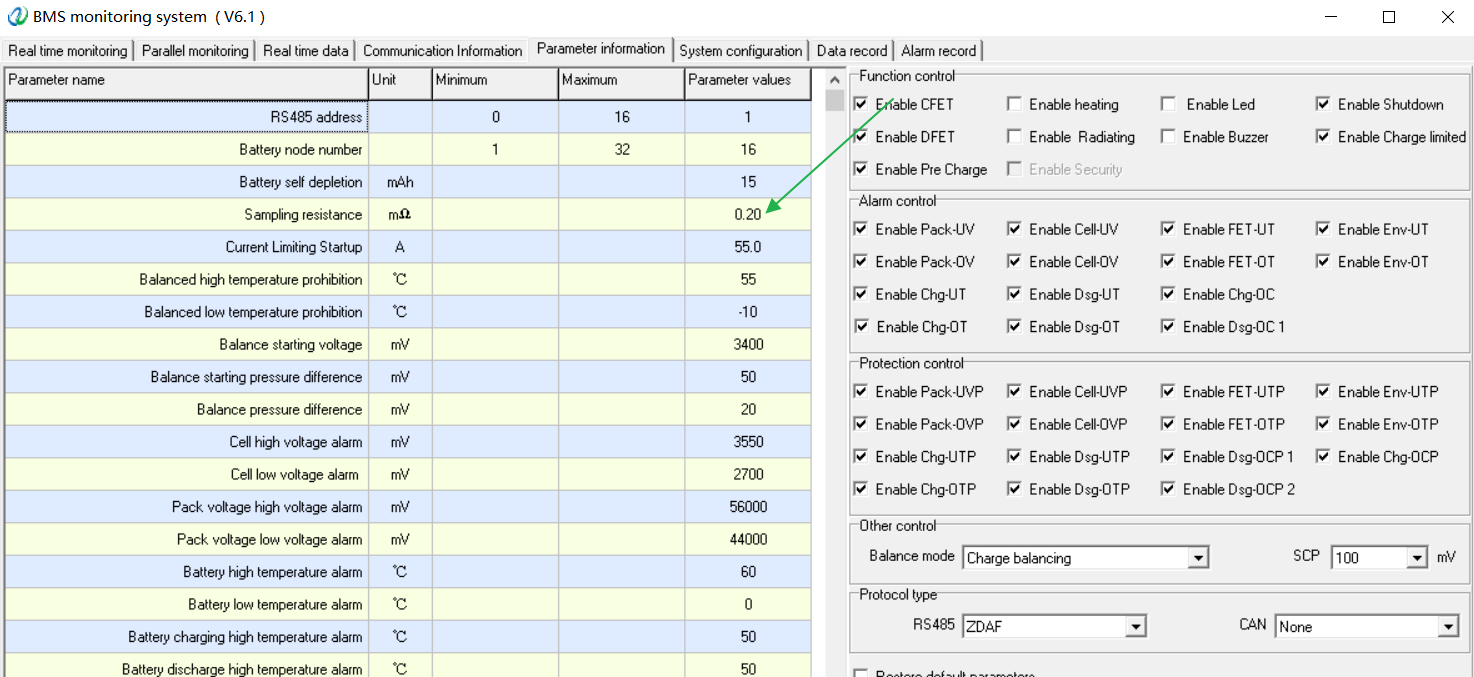
please go to the page of "Parameter Information" to adjust the sampling resistance ,see following ;
if You can change sampling resistor from 0.20 to 0.19, 0.18, 0.17….. gradually , the current will be changed to be larger until
Until the current the display shows is in line with the actual one
or if You can change sampling resistor from 0.20 to 0.21, 0.22, 0.23….. gradually,
the current will be changed to be smaller until the current the display shows is in line with the actual one
Master PC Software
BMS 16S Setting reference
BMS Upgrade:
please use the upgrade the " UPGRADE TOOL " with the following "BMS_MainBoard_CAN_V524-600AH " file to upgrade BMS

![]() BMS_MainBoard_CAN_V524-600AH.zip
BMS_MainBoard_CAN_V524-600AH.zip
Working Instruction of BMS UPGRADE
BMS BIN File :
Bin file for Growwatt SPH
![]() BMS_MainBoard_CAN_V525 Growatt SPH(Reset)--.rar
BMS_MainBoard_CAN_V525 Growatt SPH(Reset)--.rar
Bin file for Goodwe -V1.7
![]() BMS_MainBoard_CAN_V52C-Goodwe V1.7(Reset).rar
BMS_MainBoard_CAN_V52C-Goodwe V1.7(Reset).rar
Bin file for BMS floating charge
BMS RS 232 Communication Protocals
![]() 48V BMS RS232 Communication protocals.pdf
48V BMS RS232 Communication protocals.pdf
RS485/CAN Port Definition
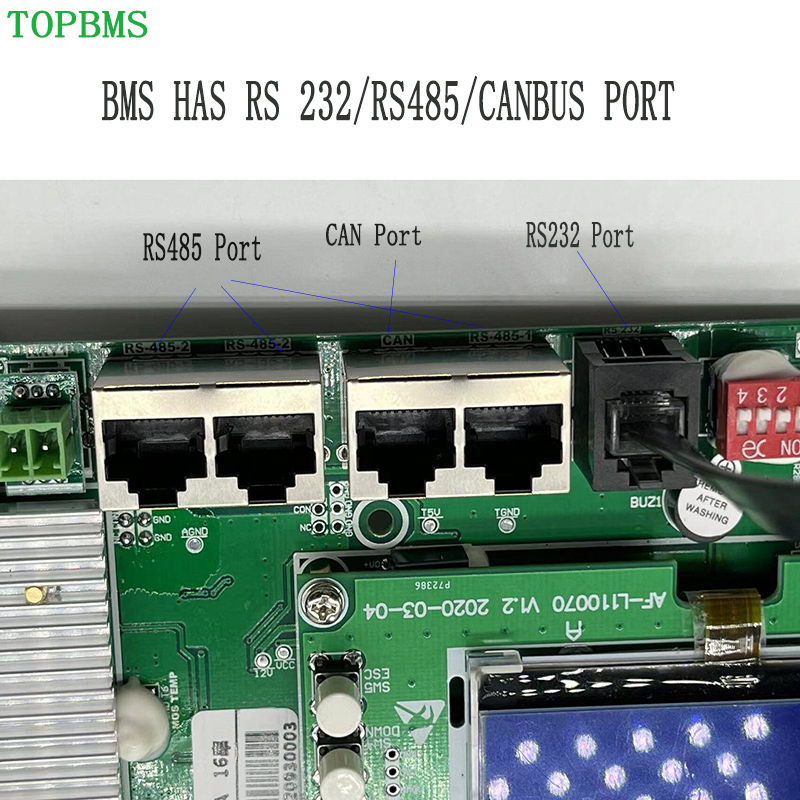
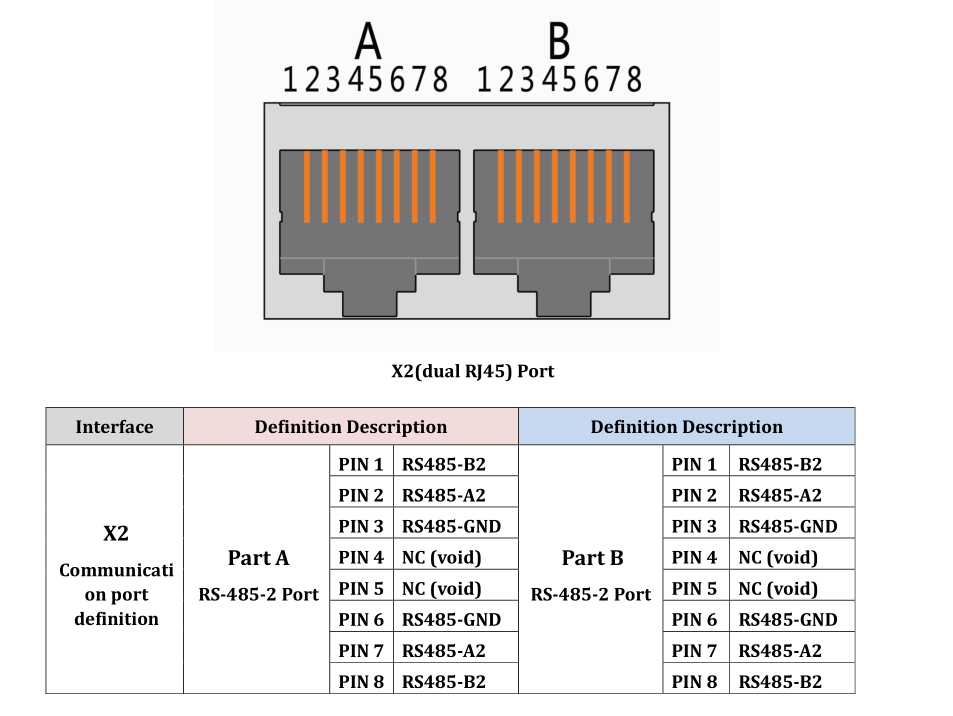
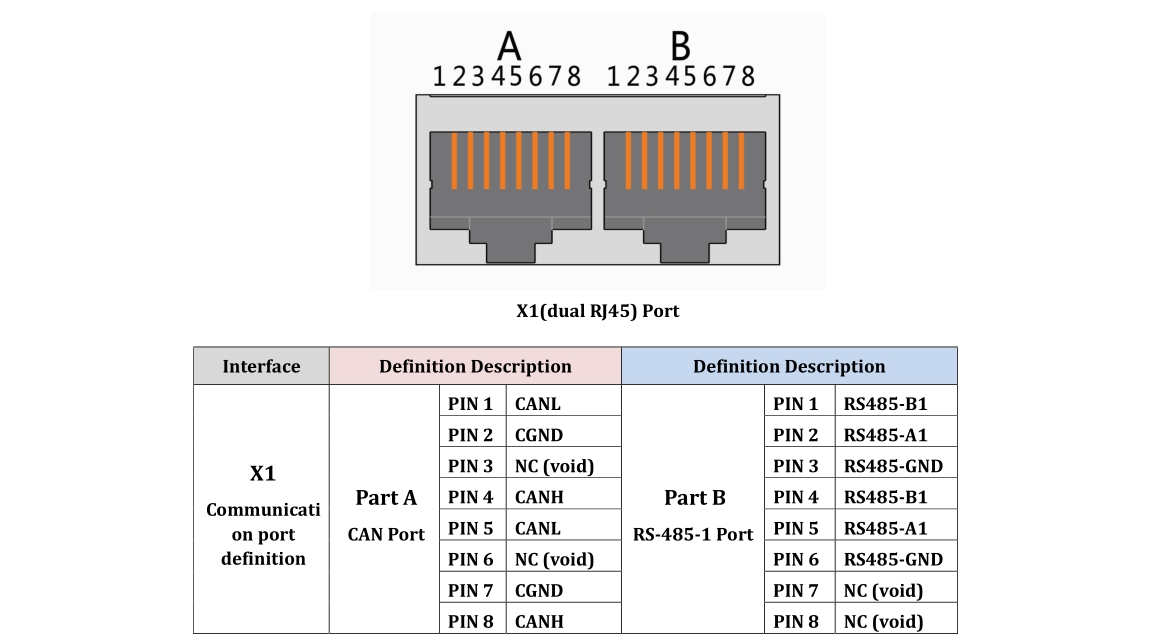
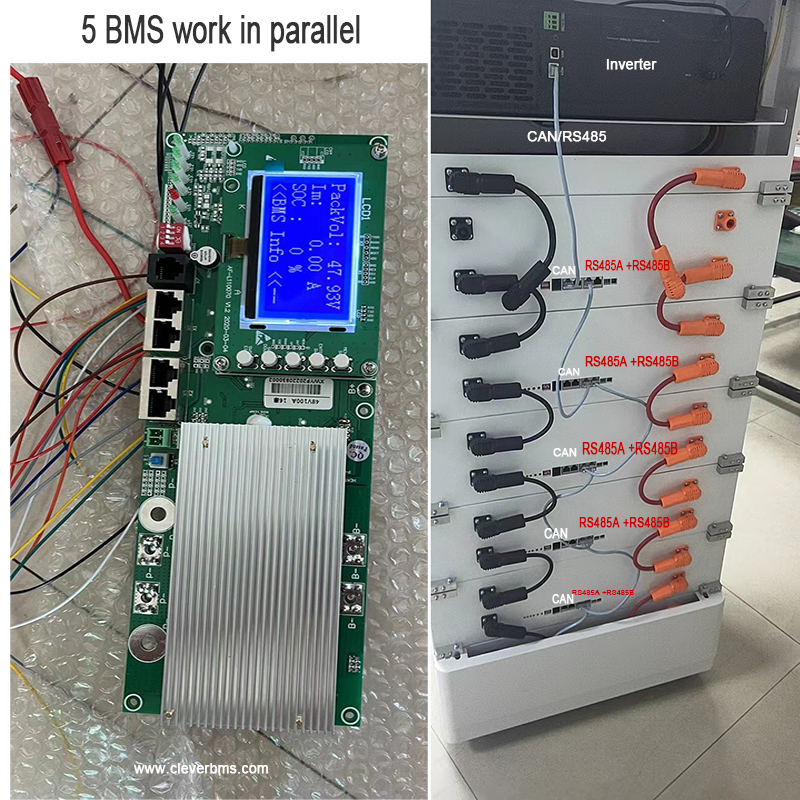
If you want to change bms 16 to bms 15s ,BMS 14s ,BMS 13s and BMS 12s,please do wiring diagram of BMS 16S changed to BMS 15S ,BMS 14S , BMS 13S , please refer to the following diagram :
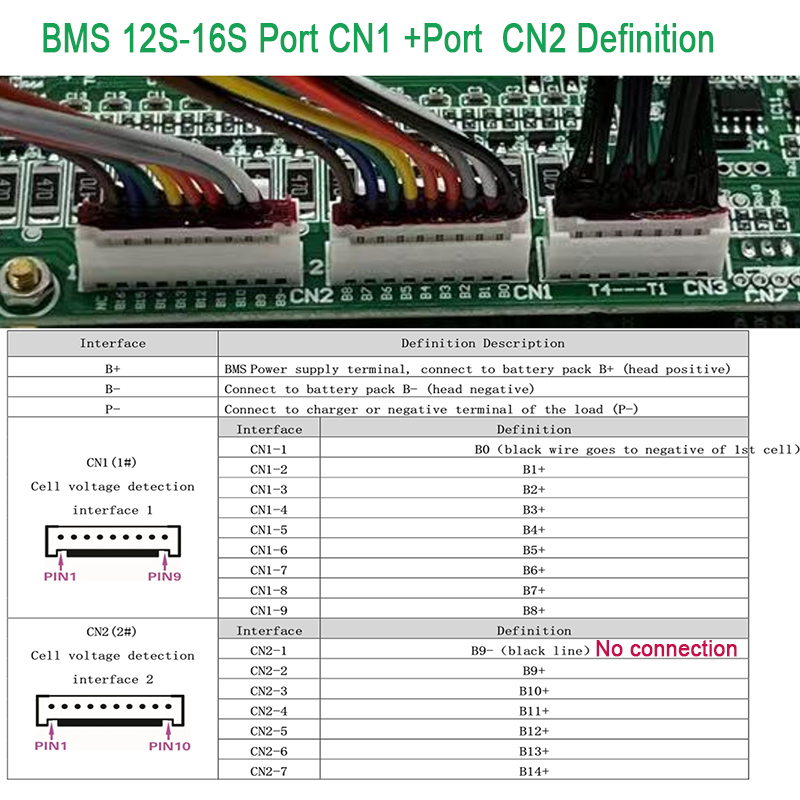
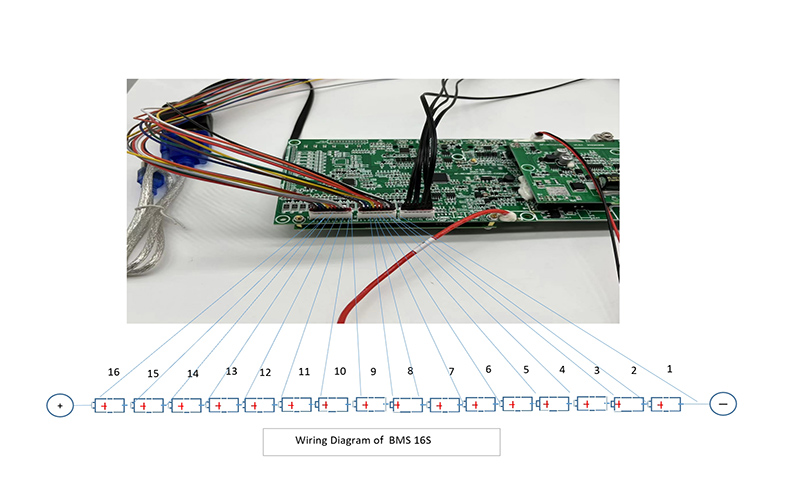


After you wires the bms , please adjust/ change the parameters VIA the PC computer when you change bms 16s to be bms 15S ,BMS 14s ....; please follow the below video and instruction /photoes


If you want to change the charging current , please change the setting of current Limiting startup
